A home-made jig for ripping small pieces on a sliding European Table Saw
What (or who) is Fritz and Franz? On YouTube there is a video of a guide to hold smaller pieces of work on a Martin sliding table saw. Great video except it is in German - but you can still see how the device is used. Apparently the guide is sold as a kit of parts and labels to help you build the actual device, but nobody I know has been able to find the kit. So I built one myself.
Construction
In my usual way, the actual dimensions of a jig are largely determined by the scrap materials at hand. Therefore most of the suggested dimensions can be drastically modified if convenient for you. My first attempt worked very well, so I did not build a second one for taking pictures - ignore the saw cuts you see that haven't been discussed yet.
First, I wanted a jig that was more than an inch thick, so I started by laminating two pieces of scrap plywood together, about 12 by 14 inches. I just glued and screwed the two pieces together, thinking ahead to where I would be cutting, when placing the screws (but if you guessed wrong, the screws can be removed after the glue is dried).
Second, I wanted a hardwood edge along the blade, so once the glue was dry, I trimmed one of the 12 inch sides perfectly smooth (saw cut) and glued on a scrap of hardwood about an inch thick.
Now the only "critical" part: Cut a piece of hardwood the width of the slot in your slider - 5/8" on my MiniMax, and at least the length of your piece above (12 inches in my case). I will call this the miter bar, since it would fit in the miter slot of an ordinary table saw (but the slot on the slider is not a miter slot). Draw a line on the bottom of the plywood/hardwood piece above, parallel to the hardwood, where you will be attaching the miter bar. It should be about 7 inches from the outside of the hardwood edge - such that when the miter bar is attached, and placed in the slider, a small amount will have to be trimmed off the hardwood edge. Screw the miter bar to the jig (peek ahead to how the jig will be cut in two to see where the screws should go). Since the saw's miter slot holds the jig by the top of the bar - the part next to the plywood - you may find it helpful to slightly taper the miter bar with a hand plane... so that it drops into the slot on the slider more easily, but be sure there is no "play" in the jig when it is flat on the slider. Once you are happy with the miter bar - it slides along the slot easily, and has no wiggle in any position, trim the hardwood edge using the miter bar as the alignment. This will flatten the hardwood, but more important, it will make the hardwood edge absolutely parallel to the miter bar, and perfectly aligned with the saw blade.
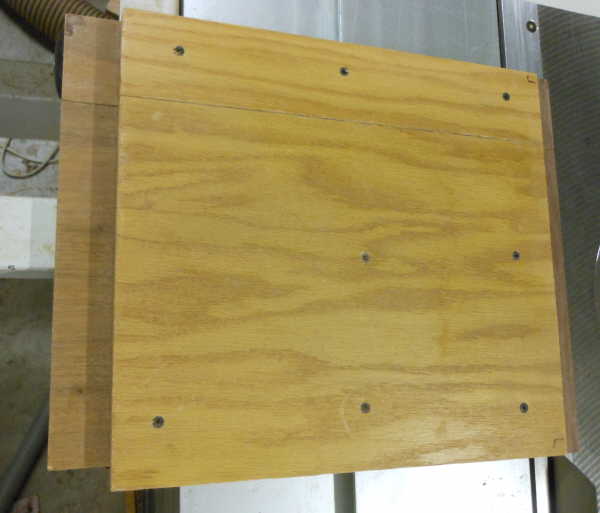
Now we have one edge, the hardwood edge, "calibrated" to the miter bar. Put that edge against the cross-cut fence (rotated counterclockwise 90 degrees from the picture above), and trim the leading edge of your jig perfectly square to the hardwood edge. Make another cut about 2½ inches from the leading edge - you have cut the entire jig into a wide piece and a narrow piece.
I have some junk sandpaper that I use on jigs... fairly thin so it glues perfectly flat. Attach sandpaper (as the non-slip surface) to both sides of the "2½ inch cut" of the jig.
In use, the 2½ inch part goes against the cross-cut fence (and since the fence holds this piece square, we don't need a long bar to hold it square - just to establish the distance from the saw blade). The hardwood edge is aligned with the cutting edge of the blade, so can be used to align the work piece. The wider part of the jig slides against the trailing edge of the work piece, again with the hardwood edge aligned with the cutting edge of the blade. Since the miter bar holds this part square, rather than being against the machine's cross-cut fence, this part needs to be longer.
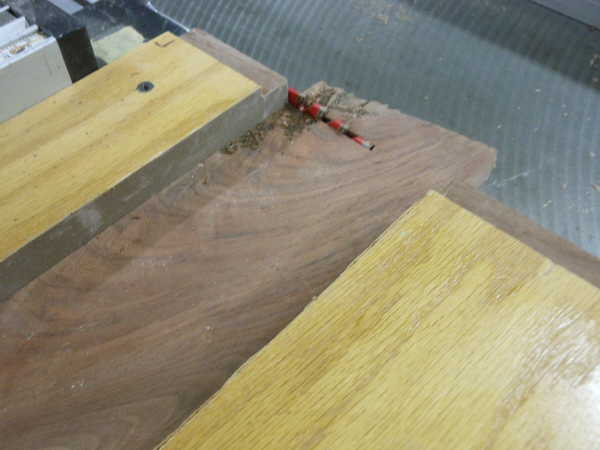
This is how it is used. If you want to be fancy, you can attach a handle to the wider trailing piece - but in my cheap and simple approach, I haven't found the need for a handle. You can attach a scale, but I haven't found the need for a scale (watch the video - they have a scale, but don't use it).
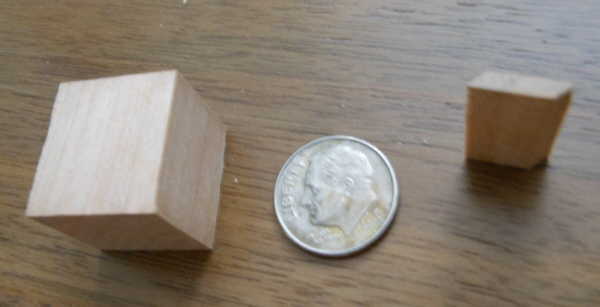
This is presumably for cutting small pieces. So I tried making a small 5/8 inch cube. It was easy and safe. My hands were always many inches away from the saw blade. I could not have made this on a conventional table saw.
So I made an even smaller piece, about 1/16 inch thick, and 3/8 inch wide (with two beveled sides), and 5/8 inch long. All six surfaces were cut with the sliding table saw, and the blade was never close to my fingers.
More than small pieces
This jig works for small pieces where there isn't another safe convenient way to cut them. But I found it worked well for large pieces as well. I used it to hold some rough cut lumber to rip the first side straight, and it worked great. I then used the rip fence for the second side, using the side just cut along the rip fence. The wood was first rough cut to length, so there was normally a good end for the jig to grasp through the cut.
I need your help. I am a happy MiniMax user, but not a MiniMax employee, and have not used all the different equipment. I do not have special access to official information. If you have additions or corrections to this information on MiniMax products, please share it. Please email your MiniMax info to me.