There is no one perfect glue for all uses. Therefore when choosing a glue, you should consider
How will it be applied?
What clamping pressure is required?
Will the glue fill gaps in the joint?
Does the joint need to be moisture resistant or waterproof?
Is the material porous, oily, or non-porous (plastic, metal)?
Will the glue creep under pressure or with weather changes?
What is the tack time, the set time, and the cure time?
Will the glue show? Can it be sanded? Can it be stained?
Is the joint repairable?
PVA Glue - Polyvinyl Acetate
There are a number of variants of PVA glue, but all are water based, and all are intended for gluing porous surfaces such as wood, paper, fabric, or cork. Since a previously glued surface is no longer porous (without total removal of the previous glue), a joint is not easily repaired. It is normally applied to both surfaces so that it can be worked into the pores. PVA likes to be clamped firmly, but not so tight that all the glue is squeezed out of the joint. PVA glue joints will creep slightly, an advantage when gluing dissimilar woods that may have uneven expansion/contraction, but that creep makes them undesirable for most bent-wood laminations and veneering (where the creep can allow the veneer to slip during seasonal expansion/contraction). These glues will tack (so the joint no longer slips) in minutes, will set in an hour or so (the clamps can be removed if the joint is not under stress), but takes a day or more to reach full strength.
White glue is relatively strong, but is easily cleaned (the glue removed) with warm water. Bordens (Elmer's) white "School Glue" appears very similar to Bordens white "Glue All", but according to Bordens there is more strength in the Glue-all, and slightly more flexibility (for craft projects) and washability in the School glue. Be sure you get "Glue-all" and not "School Glue" for your woodworking projects. If you are going to use PVA glue for veneering (definitely not a first choice), white glue is especially useful, since a the glue can be applied and dried (maybe a couple layers), then the glue can be reactivated as the veneer is "ironed on" with a relatively cool iron (delicate setting, about 180 degrees). Unlike yellow glue, it can be reheated and re-adhered several times.
Yellow or Carpenter glue is stronger than white glue, although some question if the extra strength is necessary. With effort, it can be cleaned and re-dissolved with water, but not as easily as white glue. Face/edge grain joints are generally stronger than the surrounding wood with both yellow and white glue. It will fill a small gap, such as an imperfect joint, but is not a general gap-filler. Even though it does not claim to be water resistant, I have used this successfully for cutting boards and turned bowls that are occasionally washed (but not soaked). If I have a mess after gluing a joint (ooze out or a fingerprint that I missed), some clear water and elbow grease saves the day - even allowing the wood to be stained (unlike the water resistant versions of PVA glue.) When veneering by reactivating dry glue with heat, yellow glue requires a higher heat than white glue (250 degrees, silk/polyester to wool setting), and additional reheating after the first are not very strong. The "iron on" should be done within 6-8 days. Elmer's Carpenter glue and Titebond ("original", I) are examples, along with many store brands.
Heat-Lock is a special glue for iron on veneering and edge banding, that presumably is better than using either white or yellow PVA glue. It is sold by Veneer Supplies (Joe Woodworker) and by Highland Hardware. It is ironed on with a "cotton" setting, about 193 degrees, with lots of hints on the Better Bond web site.
Waterproof PVA glue, such as Titebond II, is water "resistant" but not waterproof. It cannot be used in marine or other applications that may be "soaked" in water, but is suitable for exterior trim. While it is still wet, it can be cleaned with water, but after it has dried (that glue fingerprint you missed) cleanup is extremely difficult due to water resistance. I do not use this glue... exterior furniture often gets into positions where water can pool at a joint, which could destroy the joint since it is water resistant but not waterproof. Titebond II passes the Type II ANSI water resistance test, which involves three cycles of soaking a joint for 4 hours, then baking in a warm oven for 19 hours - if the joint doesn't delaminate (fall apart), it passes. Since it doesn't meet my expectations for exterior use, and is harder to clean up in interior use, why bother? The furniture I make is not exposed to these conditions, and I probably won't be able to undo a joint if I need to fix it. Heat activation for veneering, if you insist on using PVA glue, must be done within 72 hours of applying the glue, with a fairly hot iron (350 degrees, cotton to linen setting).
Titebond III claims to have an extended open time, and work in lower temperatures, than Titebond II, but it is only slightly longer open time, and a few degrees lower working temperature. The bottle is labeled "waterproof" but the specification sheet indicates it should not be used where it can remain wet, so I consider it only water resistant, like Titebond II. Titebond III passes the Type I ANSI water resistance test, which involves boiling for 4 hours, baking at 145 degrees for 20 hours, then boiling for an additional 4 hours, and testing strength while still wet from boiling. I'm not interested, because the furniture I make isn't exposed to these conditions, and it means I probably cannot undo a joint if I need to fix it.
General notes on water based glues
The open time of any of these PVA glues depends on when the water evaporates, allowing the other chemicals to react. Therefore you can extend the open time by moistening the wood or spraying on a mist of water after applying the glue, without buying a premium product. The lower operating temperature of some glues is only a few degrees - not significant.
Most water based glues are nominally cured in a day. However, the wood around the joint will have absorbed water from the glue, and will have expanded slightly. If you sand the joint, making it perfectly flat, in the first day or so after glue up, when the moisture level returns to normal that area will shrink, leaving a "sunken" joint. Wait as long as possible (multiple days or even a week or more) after gluing before sanding. A stepped joint is similar - the parts of the joint end up uneven because the moisture content of the wood being joined was different before the glue up, or one side of the joint absorbed more water from the glue than the other side.
The rated shelf life of water based glues is fairly short - a year or two - but if the glue becomes thick, it can simply be thinned with a small amount of water, long after the rated shelf life. However, if it starts to form clumps, like cottage cheese or curdled milk, it is time to discard it. Dump it on some sawdust and let it dry before sending to a landfill.
All of these glues like a fairly high clamping pressure, and typically result in glue squeeze out at the joint. A wet cloth or green scrub kitchen sponge works great for removing the glue while it is wet (although I only recommend this approach with the Carpenters glue or Titebond Original). Some people like to scrape it off while it is drying. Once it is try, it may be a challenge to remove from the pores (which is why I prefer the plain Titebond, not II or III.
What if you have something that can't be clamped, like a triangle on the edge of a piece. Make the surfaces to be glued VERY smooth (hand plane). Position the work so it will stay together without glue or support. Apply PVA glue to both surfaces. Rub them together while pressing together by hand. You will feel the glue start to stick. Stop when perfectly aligned. Do not disturb for at least an hour or more. This "rub joint" really works with no clamps!
Polyurethane glue
The big advantages of polyurethane glues such as Gorilla Glue are that they are waterproof, and can be used on both porous and non-porous materials. They are activated by minute quantities of water; often there is enough moisture in the wood to activate the glue, or a water mist can be sprayed on one of the surfaces. There is also enough moisture in the air to turn a container of glue to a solid block in months after it is opened.
The glue is very strong, but it foams as it is activated, so it must be clamped to keep the joint together. The foam has virtually no strength, so if your joint isn't perfect before it was glued, the foaming glue will fill the gaps in your joint, and since the foam is weak, the resulting joint will be very weak. If you are repairing a previously glued joint, or the wood has been finished before assembly (the wood is no longer porous) polyurethane glue can be used where PVA cannot. Any time you are gluing a pre-finished piece, the joint failure is more likely to occur between the wood and the finish, than between the finish and the glue. The wet polyurethane glue can be removed with paint thinner (mineral spirits). The foam is relatively easily removed by cutting, and can be sanded and stained.
Polyurethane glue does contain a chemical that discolors skin - new skin with replace the discolored skin in about a week, but the discoloration cannot be washed out - wear disposable gloves!
Gorilla glue is highly advertised, but there are competing products from numerous other vendors. My favorite is PL Premium Construction adhesive, a polyurethane glue in calking gun tubes - it spreads well, but is thicker than the "normal" poly glues. It also seems to foam less than the other poly glues when I use it. The dispenser nozzle clogs after the first use or two, but I get many additional uses by punching a small hole with an ice pick in the side of the tube near the nozzle, and use the usual dispenser to pump out enough glue for small projects. When done, the small hole will seal itself, and a new hole can be punched the next time.
Epoxy
This is a very strong two part (resin and hardener) waterproof adhesive that can be mixed to cure within a few minutes, or with a different mixture or hardener can have a long open (working) time. In industrial variants it can be cured with heat or ultraviolet light. It can be applied in any thickness, including filling gaps (a major advantage doing repairs). It can be mixed with a filler (commercially available glass fiber powder, or even sawdust) for even better gap filling. If it is warmed and allowed to soak into end-grain wood, that end grain can then be glued with epoxy (one of the few ways to get a strong bond in end grain). Some experts swear by epoxy for "all" their gluing needs. Although it appears expensive, these experts talk about the small amount required and the ease of mixing a "customized" recipe as it is used.
Epoxy can be colored and opaque, but is often clear, even being used as a very hard waterproof finish on pens or a clear surface on tabletops. I have used tiny amounts of Mixol Universal Tint or TransTint dyes to custom color epoxy, although I have never seen an expert say it was okay. When colored it is often used to fill gaps in Mesquite. When used in boat repairs, it should be covered with a finish that provides protection from UV rays (sunlight). It is flexible, and very heat and chemical resistant (which also means it is difficult to clean up).
The thick clear layers on the tops of bars and restaurant tables (popular years ago) is generally epoxy. Experts on bar-tops point out that when the epoxy surface is scratched through ordinary wear, it cannot be repaired, and the thick epoxy expands and contracts differently than the underlying wood, so it will eventually fail (separate from the tabletop). A finish sequence used by a respected professional bar builder is shellac to seal the wood, then several fairly thin layer of epoxy, each sanded flat, then multiple (5) layers of a very hard finish such as "Behlens RockHard" Table Top Varnish as the wear coat and UV protection.
The "name brands" of epoxy include System 3 and West System (Marine), but there are also many other good products.
Cold press (veneering)
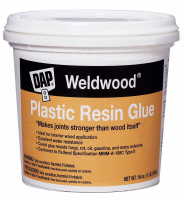
Veneering requires a glue with a long open time, that does not creep. There are a few pre-mixed glues, some two-part glues, but my favorite is plastic resin glue, sometimes called urea formaldehyde, often sold as a powder that is mixed with water a few minutes prior to use. The formaldehyde in the name scares some people away, but there is no smell that I can detect, and one report I read said the amount of formaldehyde our bodies create and exhale each day is far larger than the amount in a typical batch of that glue. It is then applied to one side (the substrate, not the veneer) with a notched trowel or roller. Veneer supplies sells Ultra Cat, a powder mixed with water that is similar to the generic plastic resin glue I have used for years, but it also has the option of a lightener that allows you to customize the color.
Other glues specifically for veneering come in multiple colors (light, medium, dark), such as Unibond 800 (a two part adhesive, mixed before use, no water to swell the wood fibers, but without water I bet the alternative solvents are toxic and/or flammible), from Vacuum Pressing Systems. Less toxic Better Bond is a pre-mixed liquid from Veneer Supplies, and is available in multiple colors.
The latest spec sheets I have seen say there is no expiration date on the powder for plastic resin glue. I am getting ready to dump half of a 25 pound can of very old powder - it no longer works. My usual local sources (Woodcraft, Home Depot, Ace Hardware) no longer have it in stock, but I found it on Amazon in 1 pound (40-50 square feet) and in 4.5 pound containers.
Some people use epoxy or hide glue for veneering (discussed elsewhere). Contact cement can only be used with paper or wood backed veneers, not "regular" veneers. I have used PVA glue for small shop cut veneers (like inlays) but some experts say they are totally unsuitable for veneering, since they soak into wood enough to soak through commercial veneers.
Rough guidelines for plastic resin veneer glue... one gallon of pre-mixed glue covers about 175-225 square feet. Five pounds of powdered glue (to be mixed with water) creates about a gallon glue, good for about 200-275 square feet. Or a more practical measure, 1/2 cup powder, added to roughly 1/4 cup of water, makes enough glue for about 4 square feet.
Mixing Plastic Resin Glue: I add 2+ parts glue to one part water; it gets lumpy, but less lumpy than when you add water to the powder. In 10 minutes or so, with occasional stirring, the lumps largely break up.
I mix it in a flexible plastic container (like an empty sour cream or cottage cheese container), using a rubber cooking spatula. It cleans up when wet using lots of liquid soap with warm water, but I leave the residue in the plastic mixing container, to show me how dry the glue in that batch is. When dry the remaining glue will pop out of the plastic mixing container.
A notched trowel works well for applying glue, but I prefer a hard rubber roller. Apply a layer to the substrate about as thick as latex paint - but thin enough to see a pencil line through the glue.
Bent wood laminations have requirements similar to veneering...a glue that has a long open time (slow to tack) and does not creep after it is dry (sometimes called a hard glue line). Consider all the glues used for veneering, for your bent wood laminations.
Joe Woodworker has an excellent page comparing glues used for veneering.
Hide Glue
This is a historically significant glue made from ... animal hides. It is still widely used in manufacturing (such as making paper). For woodworking, it comes as crystals that are dissolved in water, and it has to be warmed (a glue pot or baby bottle warmer) for use. The material to be glued should also be warmed with a heat lamp or hair dryer. Like other animal products and food, it spoils if it is not used in days or weeks after it is mixed. The good news is the joints are repairable... if a chair support weakens, warm water will dissolve the old glue, and new glue can be added without problem. Hide glue is used on musical instruments so they can be repaired.
It was also historically used for veneering - simplistically by pressing the veneer into the warm hide glue on the substrate with a veneer hammer (used like a squeegee, no pounding like a hammer). However, some experts recommend putting hide glue on both the inside and outside of the veneer as well as on the substrate. The glue on the outside acts as a lubricant, but most is wiped off by the hammer. With glue on both inside and outside of the veneer, it does not curl as badly. After it is applied, wipe the surface with a damp cloth, and the small amount of remaining glue on the surface acts as a sealer on the veneer. Unlike most glues, hide glue can be sanded and stained. Hide glue should not be used in a vacuum press. It comes in various strengths, "#192" was recommended by some experts, but I don't know what that number means. It does smell bad while it is being used (although it isn't a toxic chemical vapor).
A pre-mixed variant of hide glue is available, and is quite strong after it has cured. In my experience doesn't work well for veneering, since it doesn't have the initial "tack" of regular hide glue, to hold the veneer in place until the glue is cured. Hide glue should not be used in vacuum bags.
Cyanoacrylic (CA) glue
Super Glue is the most common trade name for Cyanoacrylic glue. For woodworking it comes in various thicknesses, often used for stabilizing or filling small flaws when turning, or as a solid coat for finishing. It can be used for joining non porous materials, but it too brittle to use for most furniture joints. (I know one woodworker who uses it to temporarily hold jigs to his furniture, then "knocks it loose" by jarring it with a hammer, which breaks the glue joint with no damage to the furniture.)
CA is infamous for gluing fingers to work pieces (consider having some "release agent" available for safety) but this same characteristic also makes a variant useful in surgery and emergency rooms as a modern substitute for stitches and staples. The FDA approved glue uses a different alcohol in it's manufacture, that generates less heat and damages fewer cells when used in large, deep wounds. I asked a doctor "now that you are a surgeon, what is in your first aid kit when you go camping with your family?" I expected him to talk about sutures, but he replied "Super glue...I don't even carry butterfly bandages any more." I muttered about taking glue from the hospital. "No, I just get the stuff from Home Depot." Works for him and his family. I don't give medical advice, but it works for me and my family for minor cuts and torn fingernails not needing other medical attention. Since I haven't found a web page on "Do it yourself surgery" I will seek competent medical attention for deeper wounds, and expect they will use the hospital variant of the CA glue. Meantime, I use the Home Depot kind of super glue for minor repairs to myself.
Contact cement
Contact cement is applied to both surfaces to be joined. When it is practically dry, the two surfaces are brought together and immediately and permanently bond to each other. It has enough creep that different materials can be joined, and the difference in expansion between the materials being joined is not likely to break the joint. The art of using contact cement is how to bring the surfaces together perfectly the first time. It was widely used for plastic laminate (Formica) countertops, but other glues are better for most other woodworking applications.
The solvent based contact cement is flammable, toxic, and smelly, and illegal in some jurisdictions, but seems to always perform well. The non-flammable contact cement is an emerging technology - some brands and some users have gotten excellent results, while others have been rated useless; hopefully modern chemistry will continue to improve the non-flammable contact cement. My experience is only with the solvent based cement, but I haven't needed this type of glue for many years. If I needed some now, and wanted to try the new technology, I would use a vendor who sells many brands of glue, (so presumably has picked the best contact cement product) and avoid the vendors who primarily sell a single type of glue (where they have less experience with glues).
One of the reasons contact cement cannot be used for veneering it that many finishing materials attack the glue, and eventually cause it to fail. A second issue, it has to be applied to both surfaces, not a good idea with a thin veneer.
Spray adhesive
Aerosol cans of adhesive are available that do a great job attaching paper templates to work pieces to be cut out. These are often purchased at hobby stores, sewing stores, or office supply stores. I sneak mine from my wife's sewing supplies.
Commercial adhesives are available in spray form (the cans of glue look like gas tanks for cooking grills), and have set times measured in seconds (no clamps required). They sound interesting, but the vendors who have approached me were no longer interested when they found I didn't use many hundreds of dollars of adhesive per year in my one-person shop.
Hot Glue
Edge banding is often applied with a hot glue - in larger shops with a heated glue pot in the edge banding machine, or pre-applied to the edge banding material, which is reheated as the edge banding is applied. (Glue pot machines can handle thicker and wider edge banding). Pre-glued edge banding can be applied with machines that cost from a few hundred to many thousands of dollars. For low volume work, an ordinary household iron can be used to melt the glue, followed by a block of wood to press the banding in place as the glue cools. If you must meet "green" standards, these glues almost always contain formaldehyde that will be emitted for the first month or two, and may destroy your meeting green standard tests.
Hobby glue guns melt and apply glue that comes in sticks. This is a useful temporary glue to hold templates in place, or to mount pieces on a lathe, but is not often useful in a final wood product.
 The formaldehyde in the name scares some people away, but there is no smell that I can detect, and one report I read said the amount of formaldehyde our bodies create and exhale each day is far larger than the amount in a typical batch of that glue. It is then applied to one side (the substrate, not the veneer) with a notched trowel or roller. Veneer supplies sells Ultra Cat, a powder mixed with water that is similar to the generic plastic resin glue I have used for years, but it also has the option of a lightener that allows you to customize the color.